Inspired by numerous people migrating their Next.js applications from Vercel to self-hosted VPS on Hetzner due to pricing concerns, I decided to explore self-hosting some of my non-critical applications. Additionally, I wanted to push my technical boundaries by running Llama 3.2 using Ollama and making its API available to power AI applications for my business, Wisp.
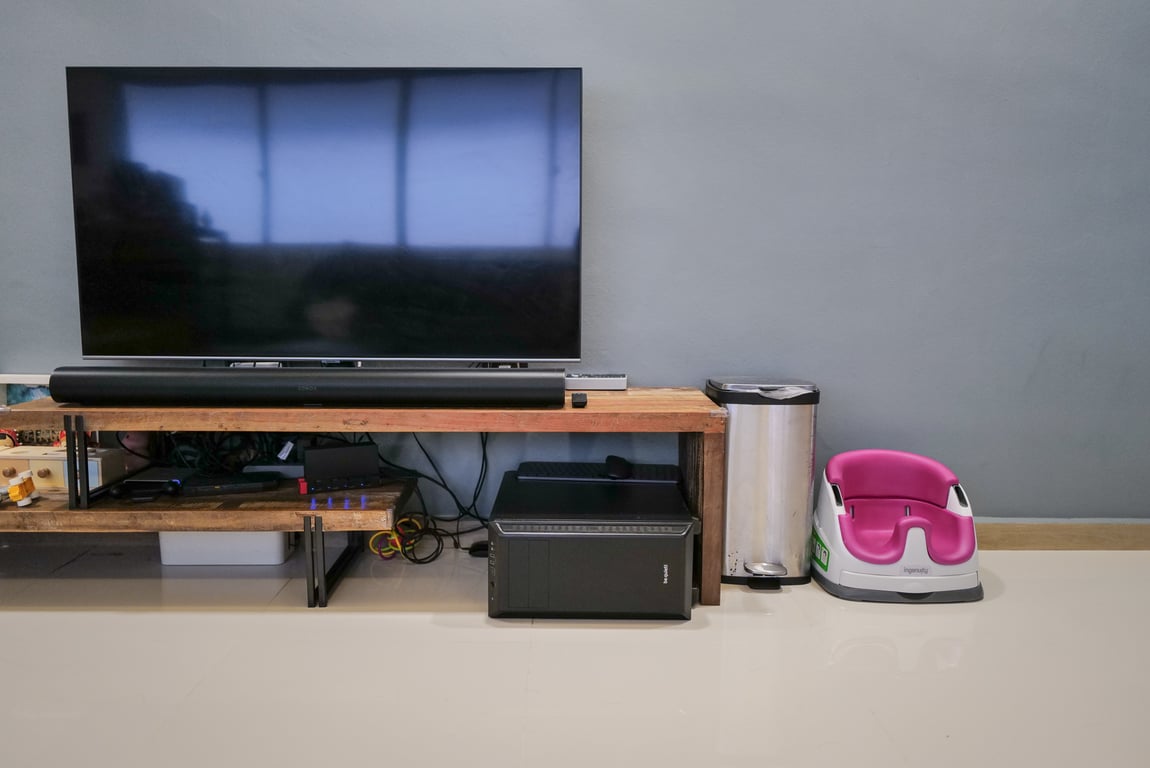
The objective was to breathe new life into an old home server that once ran high-frequency trading and MEV algorithms but had since become a step stool for my daughter to climb onto the TV console.
This blog post chronicles my journey of setting up Coolify to run Ollama (using Llama 3.2) on my home server, with a particular focus on the challenges and triumphs of enabling GPU acceleration using the CUDA toolkit.
(Update)
Since some of you are curious, this is how Llama 3.2 3B perform on a GeForce RTX 2060:
My Goals
The primary idea was to leverage my home server, previously gathering dust, to perform valuable tasks. Specifically, I wanted it to host and automate AI-related functions. Additionally, this setup would provide a centralized location to run Supabase for storing various data. The broader goal includes:
Serving a Next.js website: This site should be live on the public Internet, auto-deploy from the master branch, work with a public subdomain, and maintain no open public ports for security.
Running Llama 3.2: Utilizing the GPU for agentic tasks and making a locally accessible API.
Wildcard domain: Enabling new services to spin up effortlessly under varied subdomains.
Overall Experience
Setting up this environment was no small feat, but each step was a valuable learning experience. Here's a walkthrough of my journey:
Installing Ubuntu 24: This was a breeze, requiring only a single reboot.
Coolify Installation: The process was smooth thanks to the handy install script, which ensured most prerequisites were met. A minor hiccup was resolved by running commands as root to avoid permission issues with the
/datadirectory.Configuring Coolify: Initially, setting the server as localhost prevented assigning a domain via Cloudflare Tunnel. The fix involved adding the host as a second 'server'. Moreover, configuring the tunnel and SSL correctly took time but was crucial for security and functionality.
Cloudflare Tunnel: Patience was key here. The wildcard domain setup was essential, and understanding the nuances of Cloudflare’s free SSL certificate coverage saved time and money.
Deployment Wins: Successfully hosting my personal blog using Coolify over a Cloudflare Tunnel was a significant morale boost, fueling the energy needed to proceed with the Ollama setup.
Running Ollama: Coolify made deploying the Ollama service straightforward. However, initial trials showed slow inference speeds and heavy CPU usage.
Enabling GPU: Ubuntu 24 had the NVIDIA drivers pre-installed, but CUDA toolkit installation and configuration posed challenges. Persistent efforts led to discovering the need for the
nvidia-container-toolkitand Docker service configuration modifications to enable GPU usage. The results were remarkable, reducing inference time by over 10x.API Exposure: Securing the LLM API with an API key became the next challenge. After unsuccessful attempts with nginx, I found potential solutions by using Caddy. Something I'll work on next after writing this post.
Server Specifications
For context, here are the specifications of my home server:
CPU: AMD Ryzen 9 5950X 16-Core
GPU: GeForce RTX 2060
RAM: 4 x 16GB DDR4 3200 MT/s
SSD: 2TB SSD + 8TB SSD
Step-by-Step Guide
1. Install Ubuntu (For a New Setup)
Start by installing Ubuntu on your home server. Follow the detailed guide available on the official Ubuntu website.
Important Settings:Avoid using LVM or disk encryption for a smoother reboot experience and easier server management. Note that this trade-off means anyone with physical access can read your data.
Ensure the installation of third-party drivers to automatically get the NVIDIA driver.
Install SSH
Enable SSH to access your server remotely, which is especially useful if you’re managing it from another machine on your local network. Refer to this SSH setup guide for Ubuntu 20.04, suitable for Ubuntu 24 as well.
Update and Upgrade APT
Always perform an update and upgrade for your packages:
sudo apt update && sudo apt upgrade -yUseful Commands
Here are some additional commands for printing information about your machine and setup:
View CPU usage:
htopList NVIDIA graphics card information:
lspci | grep -i nvidiaPrint architecture, OS distro, release:
uname -m && cat /etc/*releasePrint physical RAM installed:
sudo dmidecode --type memory | lessPrint processor info:
cat /proc/cpuinfo | grep 'name'| uniqCheck NVIDIA driver information:
nvidia-smi
2. Installing Coolify
Coolify is an open-source platform designed to make deploying and managing your applications on self-hosted environments easier. Its key feature is allowing users to manage full-stack applications, databases, and services without relying on complex Kubernetes setups. Coolify streamlines deployments through a user-friendly interface, supporting services like Docker, GitHub, and GitLab.
To install Coolify, follow the automated installation instructions from their documentation:
curl -fsSL https://cdn.coollabs.io/coolify/install.sh | bashImportant Notes:
Ensure you’re logged in as the root user to avoid permission issues.
The installation script checks prerequisites, but you may need to troubleshoot some dependency errors if they arise.
Once Coolify is installed:
Visit the coolify dashboard at
http://localhost:8000. This is also available on the network. Replace localhost with the ip address of the server if you are accessing it from another machine.Set up an admin account - this is stored locally on your server.
Create your first project by adding a resource and deploying it to
localhost. In my case, I deployed my personal blog first to test the setup.
3. Setting Up a Cloudflare Tunnel on Coolify
Cloudflare Tunnel is a secure way to expose services running on your local network to the public internet without having to open ports on your router. For my setup, this was a key feature, as I wanted to keep my server behind a firewall while still allowing external access to some services.
Cloudflare’s Zero Trust platform ensures that all traffic is encrypted and routed securely, preventing unauthorized access.
To set up a Cloudflare Tunnel, follow this instructions on Coolify’s official documentation. The key is to focus on setting up wildcard subdomains for all your services.
A few key caveats:
Localhost Server Issue: You cannot assign a domain to the pre-created
localhostserver directly. To solve this, add your host as a second server within Coolify, using the IP address172.17.0.1forhost.docker.internal(since coolify will show an error thathost.docker.internalhas already been assigned to a server).Wildcard Domain Setup: Make sure you use a top-level domain like
*.example.com. If you use a wildcard on a subdomain, Cloudflare will not provide a free SSL certificate, unless you opt for the ACM plan.

After setting up the Cloudflare Tunnel:
Deploy your resources to the newly added server.
Change the domain in the service configuration to match your new subdomain.
Once everything is deployed, you should be able to access your service live from its custom domain.
4. Deploying Ollama
Once you’ve set up your Coolify project, the next step is to deploy Ollama. This service allows you to run large language models (LLMs) like Llama 3.2 on your server with a web-based interface.
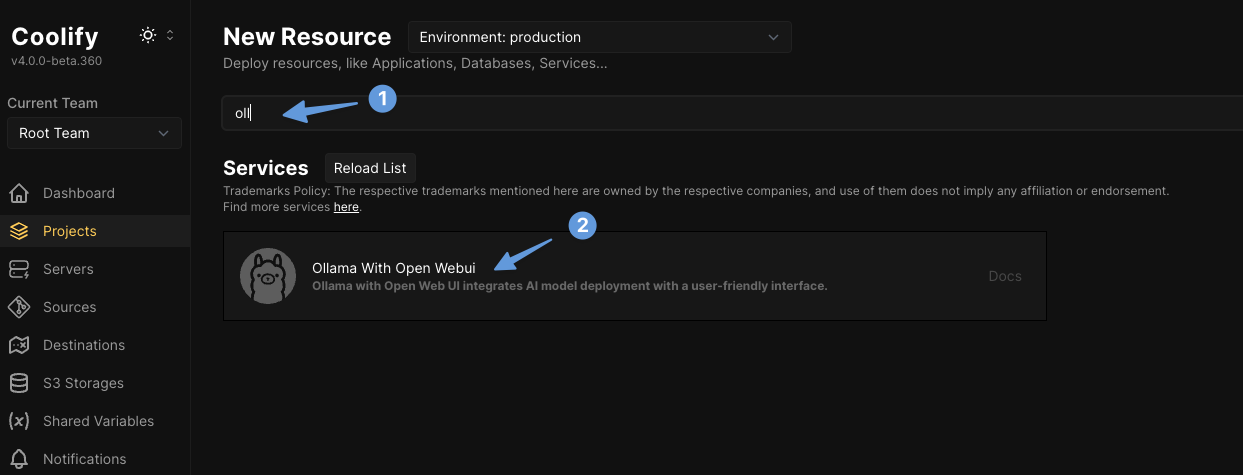
Add a New Resource: In your Coolify project, select "Add Resource" and choose Ollama with Open WebUI as the service you want to deploy to your new server.
Configure the Domain: After adding Ollama, configure the domain for the Open WebUI service. Assign a domain from the wildcard domain you set up earlier through Cloudflare Tunnel. This will allow you to access the Ollama WebUI directly from the internet.
Deploy the Service: Once everything is set up, click on "Deploy."
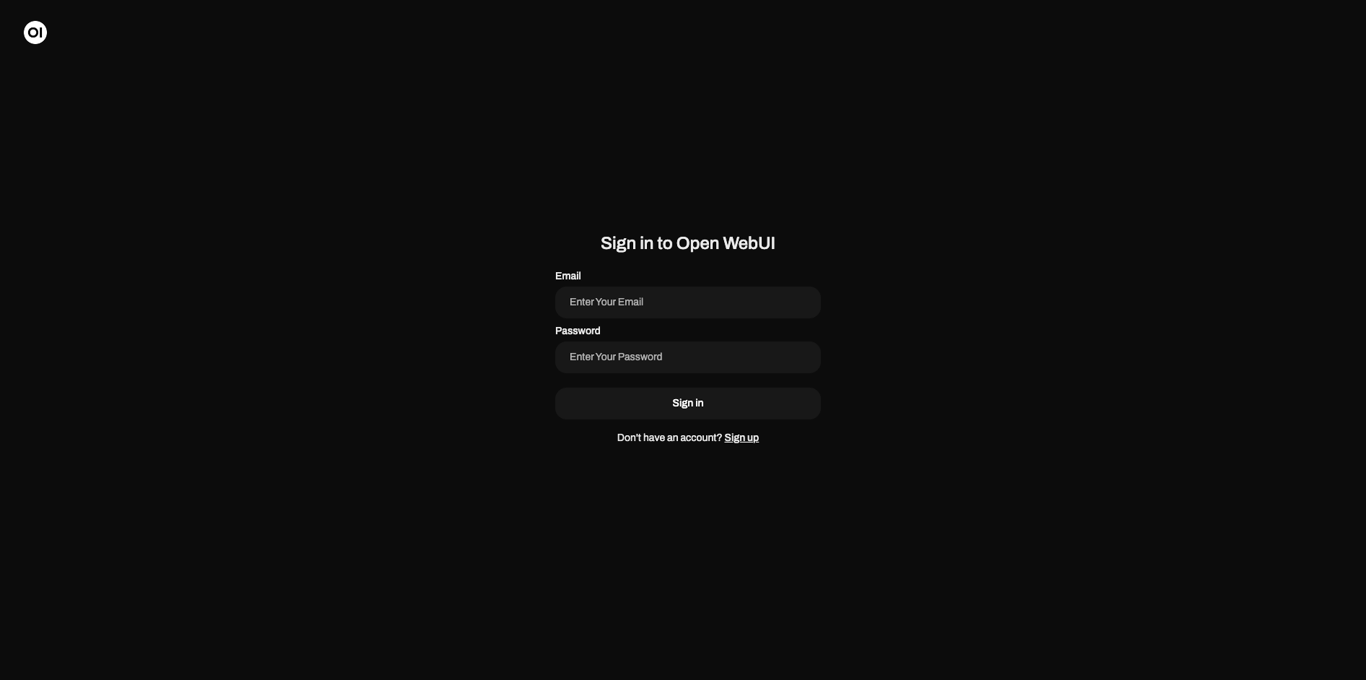
You should now be able to access the Open WebUI via the assigned domain. Upon your first login, you'll be prompted to create an admin account. This is important for managing models and access through the UI.
Install Llama 3.2: With your admin account set up, you can now install the latest Llama model. Head to Ollama's library and search for the Llama model you want to use. I opted for Llama 3.2, which can be installed using the tag
llama3.2.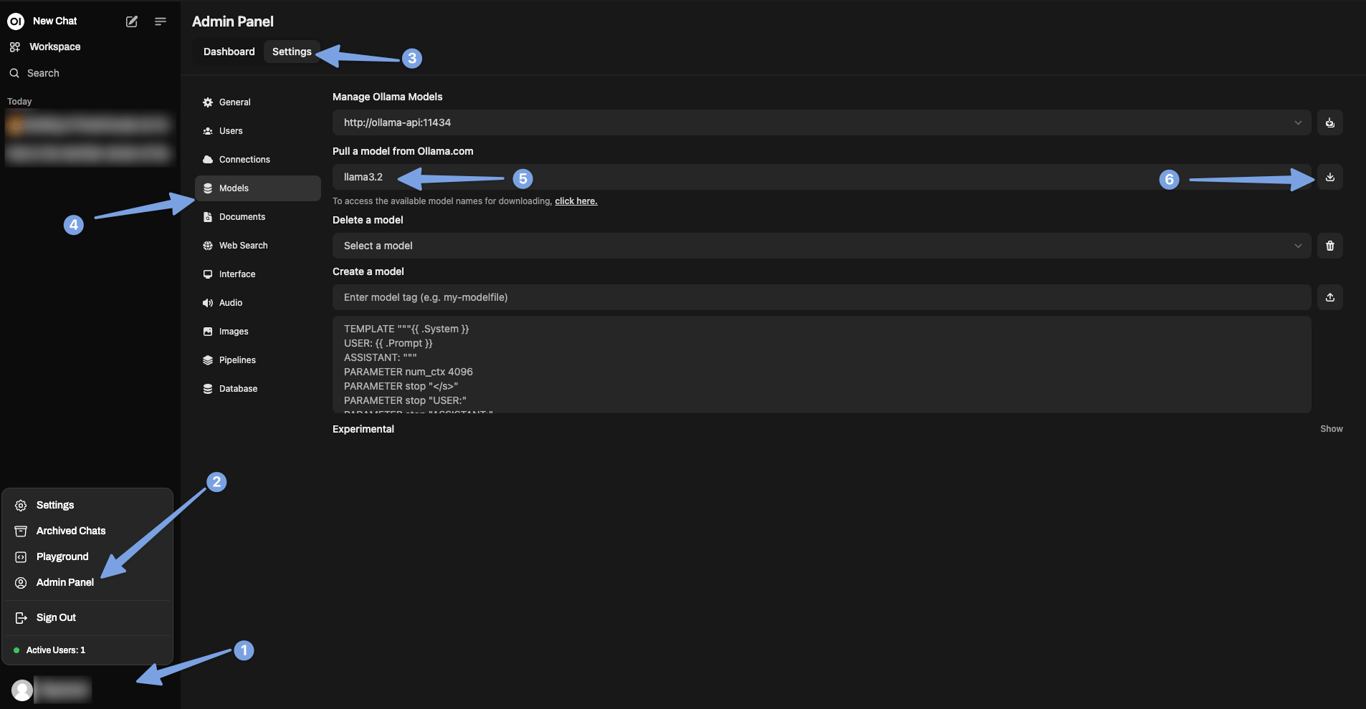
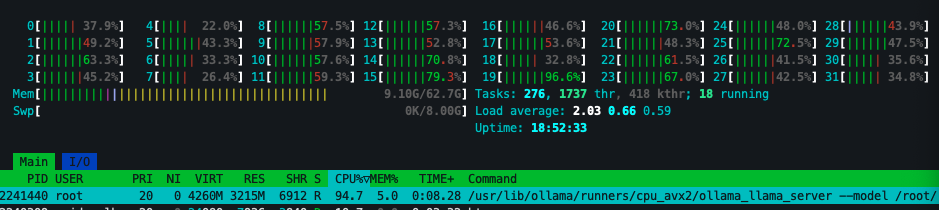
Try Your First Chat: Once installed, initiate your first chat with Llama 3.2 via the web interface. During this phase, your model will likely run on the CPU, so expect to hear your machine working hard (with increased CPU fan noise).
To monitor your machine’s performance during this, use the following commands:
htopto keep an eye on CPU usage.watch -n 0.5 nvidia-smito track GPU usage (though at this stage, GPU may not be utilized yet).
5. Configuring Ollama to Use GPU
Large language models (LLMs) like Llama 3.2 perform significantly better with GPU acceleration. GPUs, particularly those from NVIDIA, are optimized for the heavy parallel computations involved in AI workloads, which is where CUDA (Compute Unified Device Architecture) comes into play. The CUDA toolkit enables direct GPU acceleration for applications like Ollama, drastically reducing inference time and CPU load.
This is arguably the most challenging step in setting up Ollama on your server, but here’s a breakdown of the process:
(Already Done): Install the NVIDIA driver (this should have been handled during your Ubuntu installation).
Install the NVIDIA CUDA Toolkit: This toolkit is necessary to unlock GPU acceleration.
(Optional): Test that the CUDA toolkit is working correctly.
Install the NVIDIA Container Toolkit: This will allow Docker containers (like Ollama) to access the GPU.
Enable the Ollama service in Coolify to use the GPU.
Follow NVIDIA’s official installation guide to install the CUDA toolkit for your system. I recommend using the network repository installation method for the most flexibility and ease of updates.
Install the new
cuda-keyringpackage:wget https://developer.download.nvidia.com/compute/cuda/repos/<distro>/<arch>/cuda-keyring_1.1-1_all.deb sudo dpkg -i cuda-keyring_1.1-1_all.debReplace
<distro>/<arch>with the appropriate value for your distribution and architecture:ubuntu2004/arm64ubuntu2004/sbsaubuntu2004/x86_64ubuntu2204/sbsaubuntu2204/x86_64ubuntu2404/sbsaubuntu2404/x86_64
Update the APT repository cache:
sudo apt-get updateInstall the CUDA SDK:
sudo apt-get install cuda-toolkitSet up the environment for CUDA by adding its binaries to your PATH:
export PATH=/usr/local/cuda-12.6/bin${PATH:+:${PATH}}Reboot the system to ensure all configurations take effect:
sudo reboot
To ensure that your system is correctly configured for GPU acceleration, test the CUDA installation by compiling and running sample programs provided by NVIDIA (https://github.com/nvidia/cuda-samples).
First, install the necessary build tools:
sudo apt install build-essentialClone the CUDA sample repository and build the sample projects:
git clone https://github.com/nvidia/cuda-samples
cd cuda-samples
make
Navigate to the compiled binaries and run the
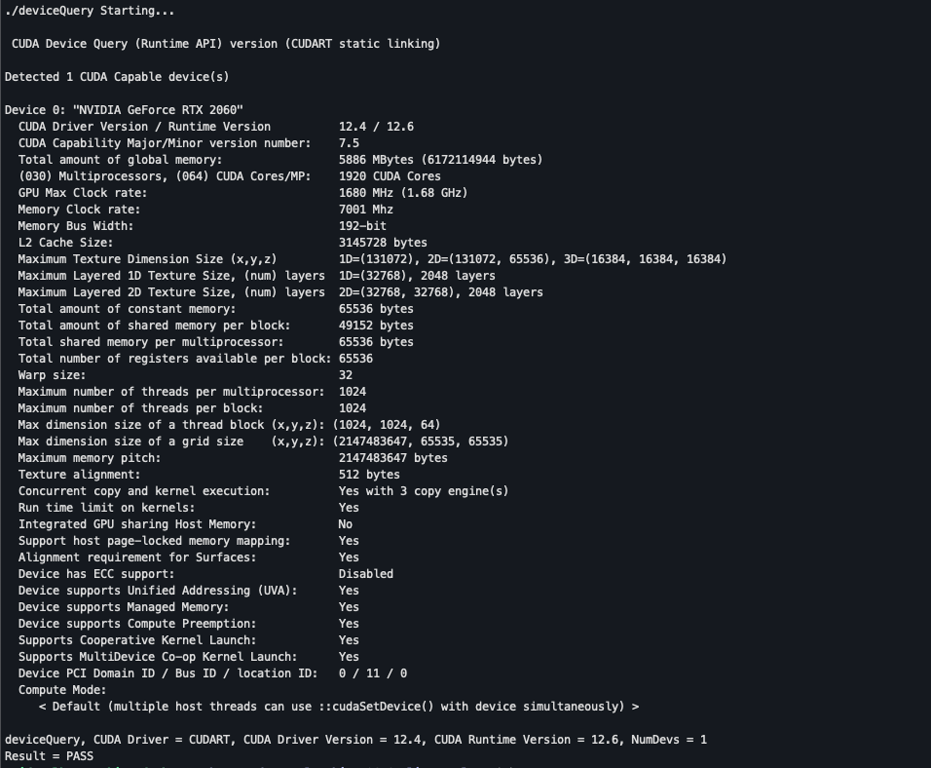
deviceQuerytool to verify your GPU and CUDA installation:cd bin/x86_64/linux/release ./deviceQueryYou should see detailed information about your GPU and CUDA environment, confirming that the toolkit is working correctly.
To enable Docker containers to access your GPU, you'll need to install the NVIDIA Container Toolkit. This toolkit allows Docker to offload GPU-intensive operations to your NVIDIA GPU, essential for speeding up tasks like model inference with Ollama.
Follow the steps below from Ollama docker docs to install the NVIDIA Container Toolkit:
Configure the repository:
curl -fsSL https://nvidia.github.io/libnvidia-container/gpgkey \
    | sudo gpg --dearmor -o /usr/share/keyrings/nvidia-container-toolkit-keyring.gpg
curl -s -L https://nvidia.github.io/libnvidia-container/stable/deb/nvidia-container-toolkit.list \
    | sed 's#deb https://#deb [signed-by=/usr/share/keyrings/nvidia-container-toolkit-keyring.gpg] https://#g' \
    | sudo tee /etc/apt/sources.list.d/nvidia-container-toolkit.list
sudo apt-get update
Install the NVIDIA Container Toolkit packages:
sudo apt-get install -y nvidia-container-toolkit
With the container toolkit installed, Docker will now be able to use your GPU.
Enable Ollama Service in Coolify to Use GPUTo enable GPU support for the Ollama service in Coolify, you'll need to modify the Docker Compose file to allow access to all the GPUs on the host machine.
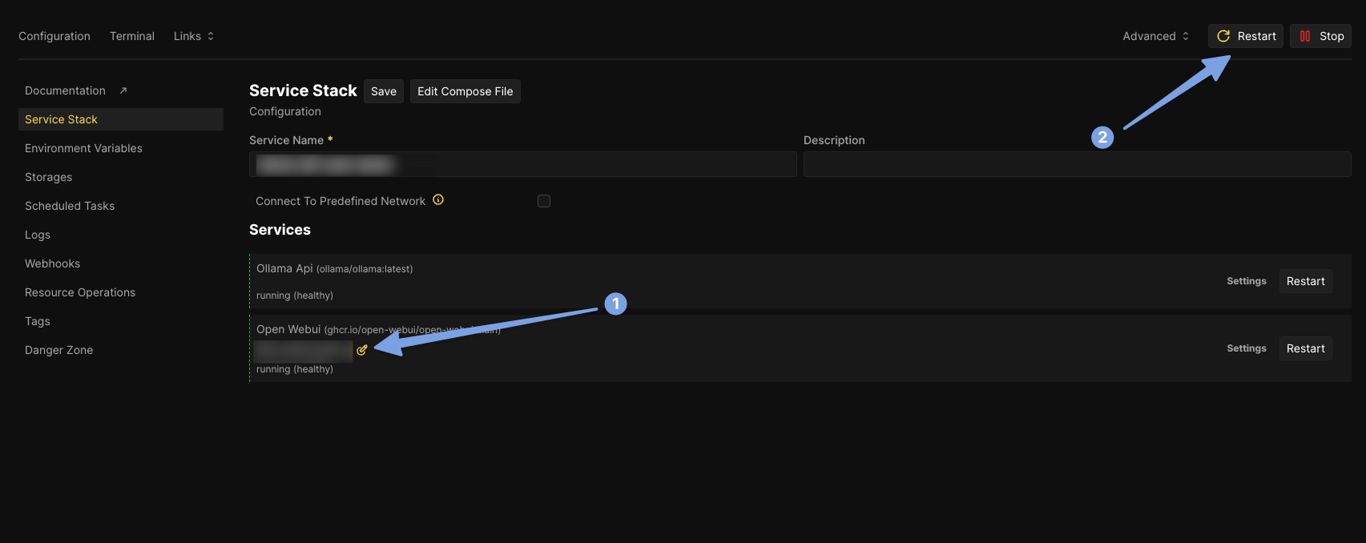
Edit the Compose File: Navigate to the Ollama service in Coolify and select "Edit Compose File."
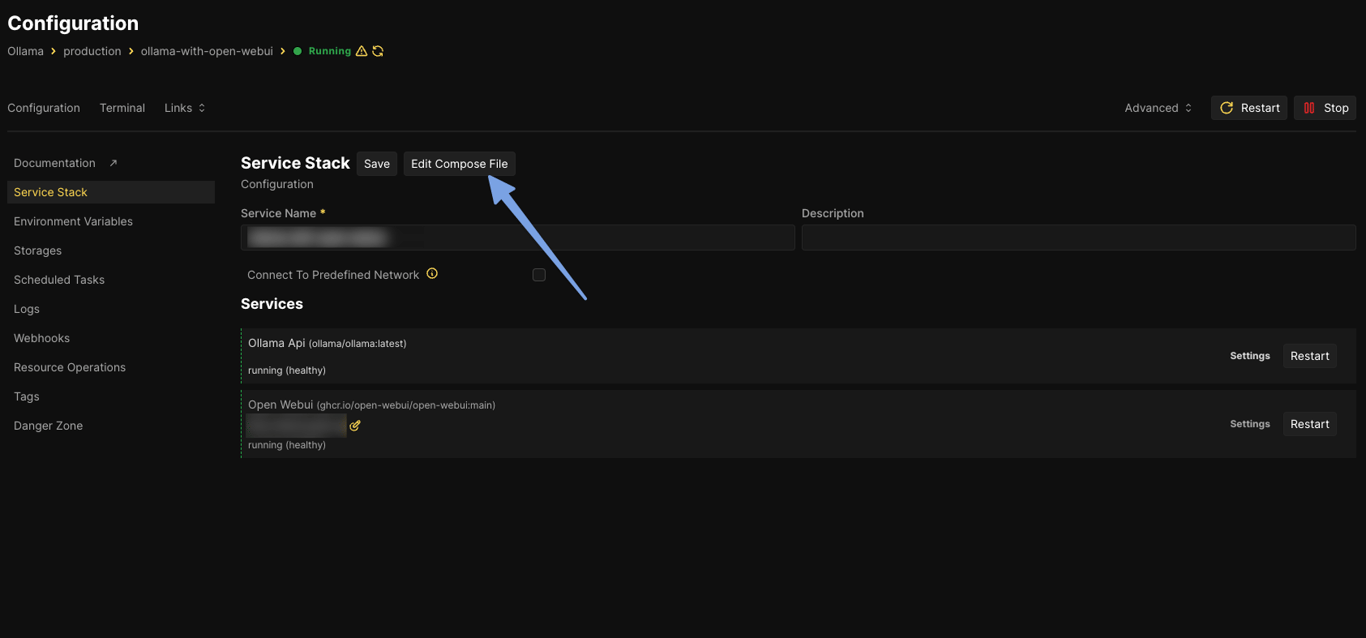
Add GPU Configuration: Append the following configuration under the
ollama-apiresource. This enables Docker to utilize all GPUs available on the host system:deploy: resources: reservations: devices: - driver: nvidia count: all capabilities: - gpuRestart the Service: After saving the changes, restart the Ollama service by clicking the "Restart" button in Coolify.
Once restarted, Ollama will now leverage your GPU for model inference. You can verify that it's using the GPU by running:
htopto check CPU usage (it should remain low).watch -n 0.5 nvidia-smito see the GPU usage in action.
Testing GPU Performance
Try initiating another conversation with Llama 3.2 via the web UI. This time, you should notice a significant reduction in CPU load, as the GPU will handle the inference tasks.
Congratulations! You’ve successfully configured Ollama to use GPU acceleration through Coolify on your home server!
Next Steps
The final step in securing your setup is to expose the LLM API to the internet while ensuring it’s protected by an API key. Using Caddy, you can enforce API key access for the Ollama service.
For a detailed guide, refer to this discussion.
Conclusion
In this post, I detailed my journey of setting up Llama 3.2 on my home server, utilizing GPU acceleration to handle AI workloads efficiently. Starting from a simple Ubuntu setup, I navigated the complexities of installing NVIDIA drivers, configuring Docker for GPU support, and deploying Ollama using Coolify. With this setup, I now have a powerful AI system running locally, handling agentic tasks with ease.
This guide walks through the entire process, from software installations to troubleshooting, and provides a blueprint for anyone looking to do the same.